When I look back at my early travel photos, most of the disappointing ones went wrong for the same few reasons. The light was harsh, the subject was stuck in the middle of the frame, the horizon was wonky and there was no real sense of what it felt like to be there. You don’t need to spend any money to fix any of that.
I shoot on a camera, a drone and my iPhone, and everything below works on all three. I’d pick two or three tips to focus on for your next trip, and I think you’ll see a difference straight away.
Do you need an expensive camera for good travel photos?
No, you really don’t. A modern phone is fantastic in good light and perfectly usable when it gets darker. A proper camera earns its place for telephoto shots, fast action and low light, but it won’t compose the picture for you, and the best camera is always the one you’ve actually got in your hand when something happens.
Light is the thing that matters most
1. Shoot at the edges of the day
The hour after sunrise and the hour before sunset give you low, warm light that shapes landscapes and flatters faces. The blue hour after sunset is great for cities, when the street lights balance with the sky, and my guide to golden hour and blue hour goes into the timing in more detail. I plan my big locations around these times and use the middle of the day for travelling, eating and scouting.
2. When the sun is high, find shade (or hope for cloud)
Midday sun gives you hard shadows and people squinting at you. Move them into open shade, like a doorway or under a tree, where the light is soft and even. Overcast days are really good for forests, waterfalls, markets and portraits, as the cloud acts like one giant diffuser, and when I was in Costa Rica the grey rainforest days gave me far better images than the bright ones.
3. Expose for the highlights
Once a white sky is blown out it’s gone for good, whereas you can usually lift the shadows later. On a camera, use exposure compensation and dial it down by a third or two thirds of a stop for bright scenes. On a phone, tap to focus and then drag the sun icon down until the sky has some detail in it. I’d always go slightly dark over slightly bright.
Composition tips: where you stand and what you include
4. Use the rule of thirds, then know when to break it
Turn on your gridlines and put the subject or horizon on a third rather than dead centre, and the picture instantly feels more balanced. I do break it on purpose for symmetry though, as a still-water reflection, a temple doorway or a long corridor often looks best perfectly centred.
Centring also works when a subject is small in a big, empty frame, like a lone tree in snow or a boat on flat water. What rarely works is the accidental middle, where the subject has ended up in the centre only because that’s where the focus point happened to be, so make the choice deliberately.
5. Follow leading lines
Roads, rivers, walls, railway tracks and shorelines all pull your eye into a picture. Position yourself so the line starts near a bottom corner and runs towards your subject. On the North Coast 500 in Scotland, the single-track road winding off into the hills did more for my compositions than any viewpoint.
6. Put something in the foreground
When a landscape looks flat it’s usually because there’s nothing in the foreground. Get low and include rocks, flowers, a boat or a fence post to give it some depth from front to back. Wide lenses and the ultra-wide mode on phones exaggerate this, so get closer to your foreground than feels natural.
7. Show scale
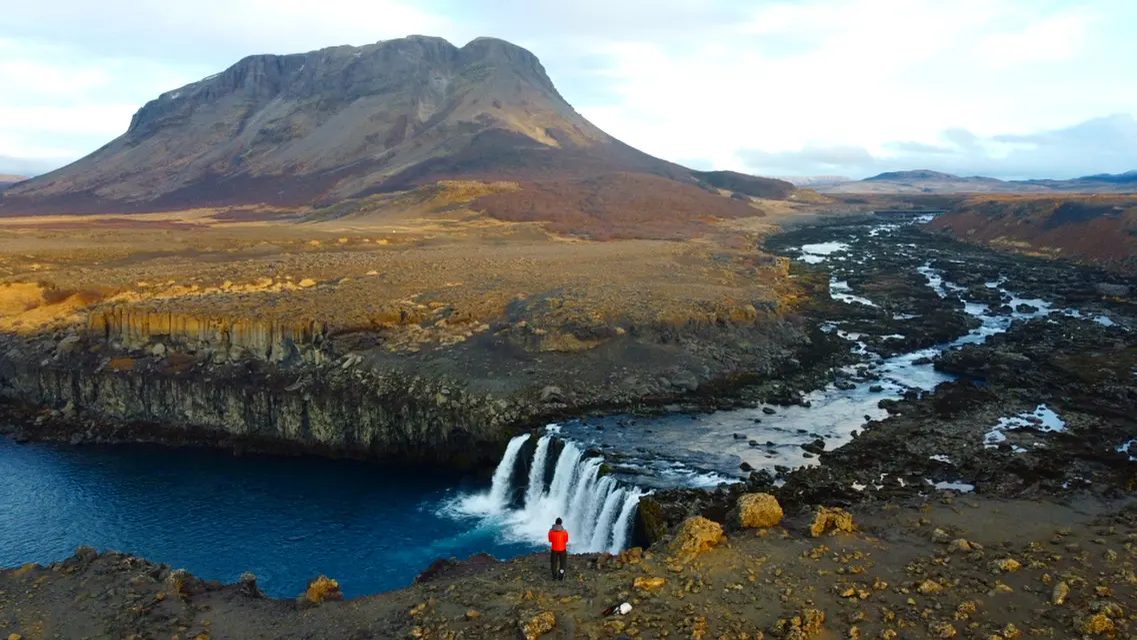
A huge canyon or mountain doesn’t mean much without something to compare it to. A small figure on a ridge or a car on a winding road shows how big the place really is, and at Petra a single person walking beneath the Treasury says more about its size than any wide shot of the facade on its own.
I try to include the person early on rather than as an afterthought, and put them somewhere that makes sense, like on the path or at the edge of the viewpoint, walking into the scene. Dark clothing against pale rock, or a red jacket against green hills, keeps a tiny figure easy to spot even on a phone screen.
8. Keep your horizons straight
It’s the simplest fix and the one people miss most. Use the level or gridlines on your camera or phone, and straighten it in editing if you need to. Keep an eye on vertical lines too, as tilting a phone up at a building makes it lean backwards, so step back a bit or correct it later.
People and story: photos that mean something
9. Ask first, then take the second frame
With portraits of strangers, a smile and a nod towards your camera is usually enough to ask, and if they say no that’s absolutely fine. The first frame is often a bit stiff, so keep shooting as they relax, laugh or go back to what they were doing, as that’s usually the one you’ll keep. Respect local customs, and be especially careful photographing children and religious ceremonies.
10. Find the stage, then wait for the actor
Find a good background, like a coloured wall, a pool of light or an archway, and then wait for someone to walk into it. It takes a bit of patience but it turns a snapshot into a proper composed moment. Wildlife works the same way, so find a good spot and let the animal come to you, and my guide to ethical wildlife photography covers how to do that responsibly.
11. Tell the story as a sequence
Try not to rely on one hero shot. I photograph each place as a small set, with a wide shot for context, a medium shot of people and what’s going on, and close details like food, hands, textures and signs. Put together, these tell the story of a place far better than twenty versions of the same view.
It also saves bad weather days. When the big view disappears into cloud, the market stall, the steam coming off a noodle bowl and the rain on a tuk-tuk roof can still make a set worth keeping.
Kit and settings that actually matter
12. Shoot in RAW
RAW files hold much more information in the highlights and shadows than JPEGs, which gives you room to rescue a tricky exposure. Most cameras and lots of recent phones offer it (on an iPhone it’s ProRAW or a RAW mode). The files are bigger though, so carry spare cards or storage.
13. Learn three settings and forget the rest
On a camera, aperture priority with auto ISO covers most travel situations. Use a wide aperture like f/2.8 to blur the background for portraits and around f/8 for landscapes you want sharp all the way through. Keep your shutter speed fast for moving subjects and faster still for wildlife. On a phone, press and hold to lock focus and exposure, and avoid digital zoom, which just crops the picture and makes it softer.
14. Carry less, and keep it clean
A heavy bag tends to get left in the hotel. One camera body with a versatile zoom, or your phone and a small tripod, covers most trips. Wipe your lens every time you take it out, as a smeared phone lens causes more soft, hazy photos than anything else. If you fly a drone, check the local rules before you go, which I cover in my guide to drone travel photography.
Editing your travel photos
15. Edit with a light touch
I start with the basics, which means straightening and cropping, adjusting the exposure, pulling back the highlights, lifting the shadows and correcting the white balance. Go easy on saturation, clarity and heavy filters, as they can look dated really quickly. It helps to use the same style across a whole trip so the set feels consistent, and then be quite ruthless and only share your best ten or so.
A quick checklist before you press the shutter
- Is the light good, or should I come back later?
- Is the horizon straight?
- Have I got something in the foreground?
- Is the subject on a third, or deliberately centred?
- Is the sky holding detail?
- Have I shot the wide, the medium and the detail?
Run through it a few times and it soon becomes a habit, and that’s when you’ll really start to notice your photos getting better!
Frequently asked questions
How can I take better travel photos with my phone?
Shoot in the soft light of early morning and late afternoon, turn on gridlines to keep horizons straight and compose with the rule of thirds, and tap and drag to reduce exposure so skies keep their detail. Avoid digital zoom, which only crops the image, and wipe the lens often. Use a RAW mode if your phone has one, and edit lightly.
What is the rule of thirds in travel photography?
The rule of thirds divides the frame into a three-by-three grid and places the main subject or horizon along those lines rather than in the centre. It gives a photo balance and a sense of movement. It’s more of a guideline than a strict rule, and symmetrical scenes like reflections, doorways and corridors often work better perfectly centred, so break it deliberately.
What is the best time of day for travel photography?
The best light is usually the golden hour, roughly the first and last hour of sunlight, when low warm light creates depth and flatters faces. The blue hour just after sunset is ideal for cityscapes. Midday light is harsh, so use that time for scouting, or shoot in open shade and on overcast days.
Should I shoot RAW or JPEG when travelling?
Shoot RAW if your camera or phone supports it and you’re happy to edit. RAW files keep more detail in the highlights and shadows, so you can recover difficult exposures and correct white balance without losing quality. The files are larger, so pack extra memory cards or storage. If you never edit, JPEG is fine.
What camera settings are best for travel photography?
Aperture priority with auto ISO handles most travel situations. Use a wide aperture such as f/2.8 for portraits with blurred backgrounds, and around f/8 for sharp landscapes. Keep your shutter speed fast enough for moving subjects, and faster still for wildlife. Use exposure compensation to protect bright skies, and shoot RAW for flexibility when editing.